Introduction
I recently developed a small API that I chose to deploy on AWS Lambda. I also had to make it secure so that only authorized users could send requests. In this article, I am going to show how I managed to deploy my application.
Prerequisites
Set up the Python environment
First, we need a Python virtual environment. It will be packaged with the application later and uploaded to the Lambda function so it has all the required dependencies.
python -m virtualenv venv
source venv/bin/activate
Next, we install the required packages:
pip install fastapi uvicorn mangum
- FastAPI: The framework I use to build my API.
- uvicorn: ASGI web server implementation for Python.
- mangum: An adapter for running ASGI applications in AWS Lambda.
Install AWS CLI
This step is optional. We can do all the operations manually from the AWS console. However, it is faster to use the command-line tool. It let us update the code of the Lambda function in one command instead of multiple steps we would have to do manually. To install the client in Linux, run the following commands:
curl "https://awscli.amazonaws.com/awscli-exe-linux-x86_64.zip" -o "awscliv2.zip"
unzip awscliv2.zip
sudo ./aws/install
Configure AWS CLI
To use the AWS command-line tool, we need to save our credentials and some configurations. The easiest way to configure the application is to run the aws configure command:
aws configure
AWS Access Key ID [None]: AKIAIOSFODNN7EXAMPLE
AWS Secret Access Key [None]: wJalrXUtnFEMI/K7MDENG/bPxRfiCYEXAMPLEKEY
Default region name [None]: us-east-1
Default output format [None]: json
The FastAPI application
Our application is going to have this architecture. It allows us to scale up by adding endpoints and to manage multiple versions of our API.
project/
    |_ venv/
    |_ app/
        |_ __init__.py
        |_ main.py
        |_ api/
            |_ __init__.py
            |_ api_v1/
                |_ __init__.py
                |_ api.py
                |_ endpoints/
                    |_ __init__.py/
                    |_ myapp.py
app/main.py
from fastapi import FastAPI

from app.api.api_v1.api import router as api_router
from mangum import Mangum

app = FastAPI()

app.include_router(api_router, prefix='/api/v1')

# Wrap the app in a handler for the Lambda function
handler = Mangum(app)
app/api/api_v1/api.py
from fastapi import APIRouter

from .endpoints import myapp

router = APIRouter()

router.include_router(myapp.router, prefix='/myapp', tags=['Myapp'])
app/api/api_v1/endpoints/myapp.py
from fastapi import APIRouter

router = APIRouter()

@router.get('/')
async def get():
    return "It works!"
Test the application
We can now test the application.
- Start the webserver with uvicorn
uvicorn main:app --host 0.0.0.0 --port 8000
- Send a GET request to the endpoint
curl http://0.0.0.0:8000/api/v1/myapp/
"It works!"
AWS setup
Our application is (almost) ready. We can start working on our AWS resources.
Create a Lambda application
First, we create a lambda function that will run our code.
-
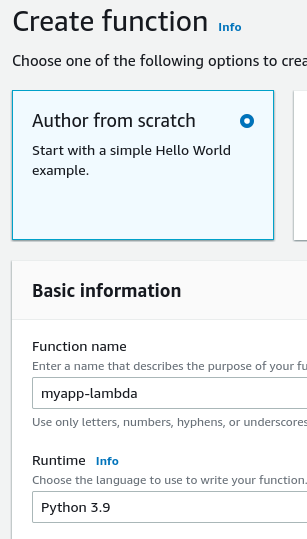
Navigate to the Lambda page and click Create function.

-
Select Author from scratch.
- Enter the function's name.
- Choose the runtime (Python3.9).
- Click the Create function button.
At this point, we are on the Lambda function page. We need to update the handler to point to the one we created in our code (i.e. handler = Mangum(app) in main.py).
- Scroll down to Runtime settings and click the Edit button.
- Set Handler to app.main.handler:

Create an API Gateway
Now that our Lambda function exists, we need an API Gateway to run our API.
- Navigate to the API gateway page.
- Choose the API type (REST API) and click the Build button.

- Select Rest, New API, and enter the API name.
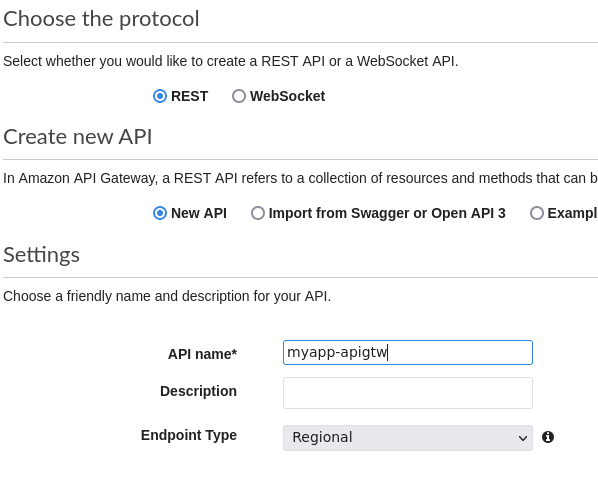 - Click the Create API button.
Create a proxy method for all other requests
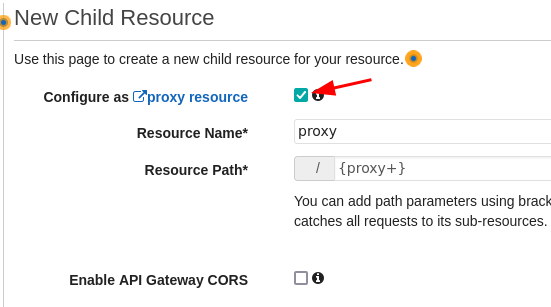
- Click Actions and select Create Resource.
- Check Configure as proxy.
- CLick Create Resource.
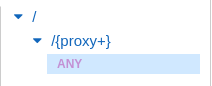
We can see that a new resource has been added (/{proxy+}). There is also an ANY. These are the methods that are accepted by the API. ANY means that all the methods are accepted.
We select the method and set the Lambda function called by the API.
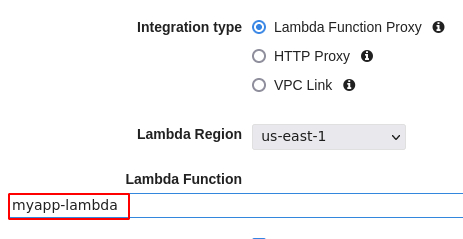
Add permission to the Lambda function when prompted.
Deploy API
Our API Gateway is ready. We can deploy it.
- In Actions menu, select Deploy API
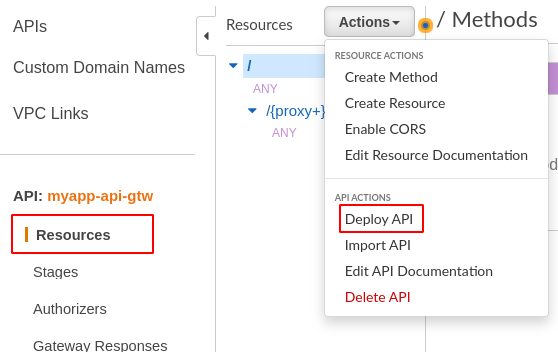
- Select New Stage.
- Enter the new stage name.
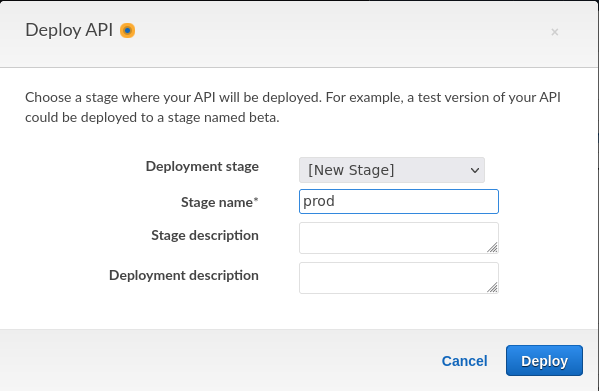
- Click Deploy.
We are redirected to the stage editor page. At the top of the page, we can see the Invoke URL that is pointing to our API:

We will have to send our requests to that URL. But before we can do it, we need to upload our application code to the Lambda function.
Upload the application to Lambda
Package the virtual environment
The Lambda function will need all the dependencies required to run our application. We create a zip file that will contain all the packages we installed in our virtual environment:
cd venv/lib/python3.9/site-packages/
zip -r9 ../../../../myapp.zip .
We add our application source code:
cd ../../../../
zip -g ./myapp.zip -r app
Update the Lambda function
Using the AWS CLI, we can update the Lambda function's code directly.
aws lambda update-function-code --function-name myapp-lambda --zip-file fileb://myapp.zip --publish
Test the API
Everything should be working now. We send a GET request to our endpoint to test:
curl https://ab1ah50v54.execute-api.us-east-1.amazonaws.com/prod/api/v1/myapp/
"It works!"
Setup an authorizer to secure our application
Our application is up and running. Currently, anyone with the URL of our API can send requests. This poses some serious security concerns. We need to make our API secure.
To do so, we are going to create another Lambda function that will work as an authorizer. Any request sent to the API will have to contain an authorization token. The API Gateway will verify with the authorizer that the token is valid.
If the token is authorized, the request is forwarded to the API endpoint.
Create a Lambda authorizer function
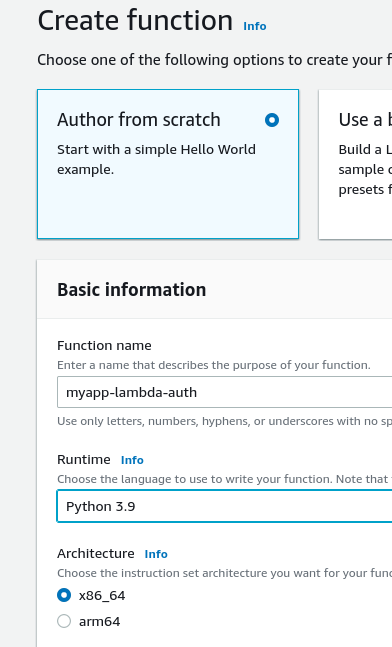
- Navigate to Lambda function and Click the Create function button.
- Select Author from scratch.
- Enter the function's name.
- Select the runtime.
- Click Create function.
The code required for the verification of the token is simple. We can type it directly in the Lambda function.
The code needs to extract the authorizationToken from the event. It then compares it with the valid token. If the tokens are the same, then the authorization is set to Allow. If the two tokens are different, the authorization is set to Deny.
After validating the event's token, we build a response that is formatted like an AWS policy document.
import os

APITOKEN = os.environ.get('APITOKEN')

def lambda_handler(event, context):
    # Validate the token provided with the request
    try:
        event_token = event['authorizationToken']
    except Exception:
        response = {'status': 400, 'body': 'Bad Request'}
        return response

    if event_token == APITOKEN:
        auth = 'Allow'
    else:
        auth = 'Deny'

    # Construct and return the response
    response = {
        "policyDocument": {
            "Version": "2012-10-17",
            "Statement": [
                {
                    "Action": "execute-api:Invoke",
                    "Resource": ["arn:aws:execute-api:<region>:<account_number>:<api_gateway_id>/*/*/*"],
                    "Effect": auth
                }
            ]
        }
    }

    return response
In this code, you will have to replace <region>, <account_number>, and <api_gateway_id> with the correct values.
- Click the Deploy button to save your changes.
Save Environment Variables
In the authorizer script, we get the API token from an environment variable: APITOKEN = os.environ.get('APITOKEN').
For this to work, we need to save our token as an environment variable.
From you authorizer Lambda function page:
- Open the Configuration tab and select Environment variables in the left menu.
- Click the Edit button
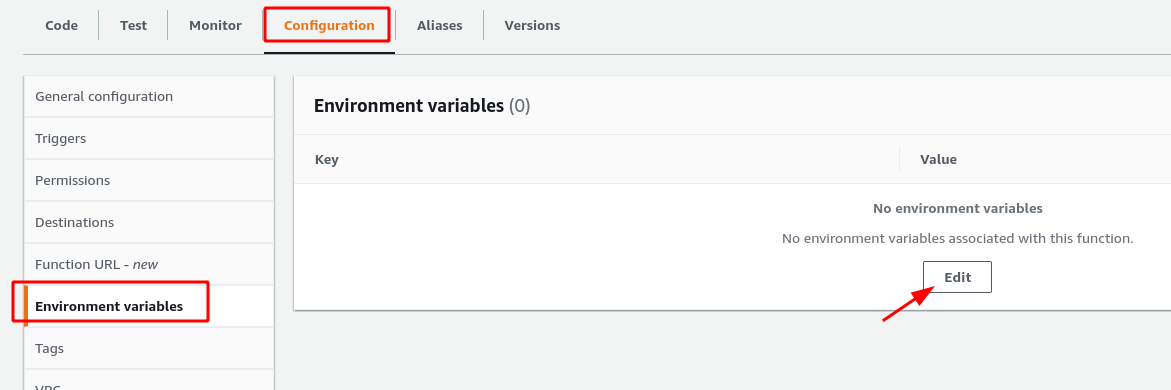
- Click the Add environment variable button
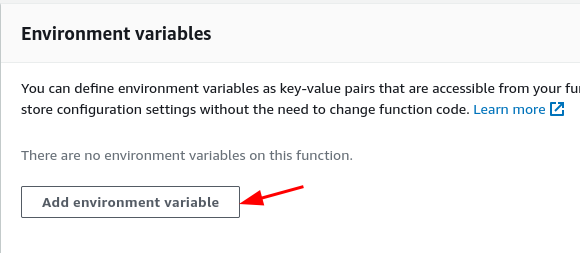
- Set the key to
APITOKENand enter a long random alphanumeric string in the value field. - Click Save

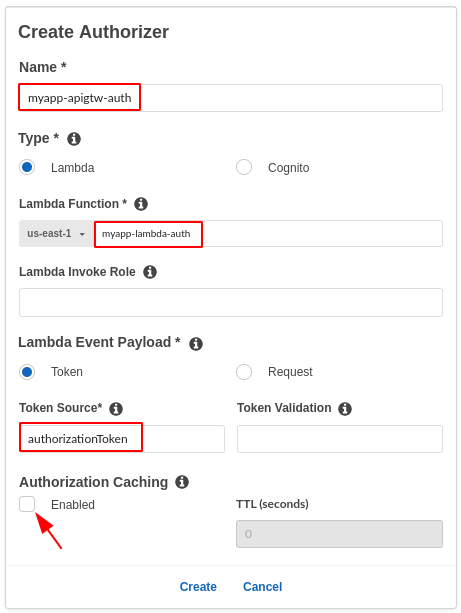
Setup API Gateway to use the authorizer
We need to set our API Gateway to call our authorizer before processing the request.
- Navigate to the API Gateway page.
- Select Authorizers in the left menu and click Create New Authorizer
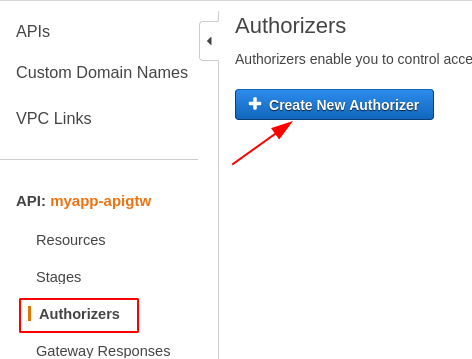
- Enter the authorizer's name.
- Select type (Lambda).
- Enter the Lambda authorizer function's name.
- Under Lambda Event Payload select Token.
- In Token Source enter
authorizationToken. - Disable caching if it is not required.
- Click the Create button
Now that our authorizer is set, we need to tell our API Gateway to use it when handling requests.
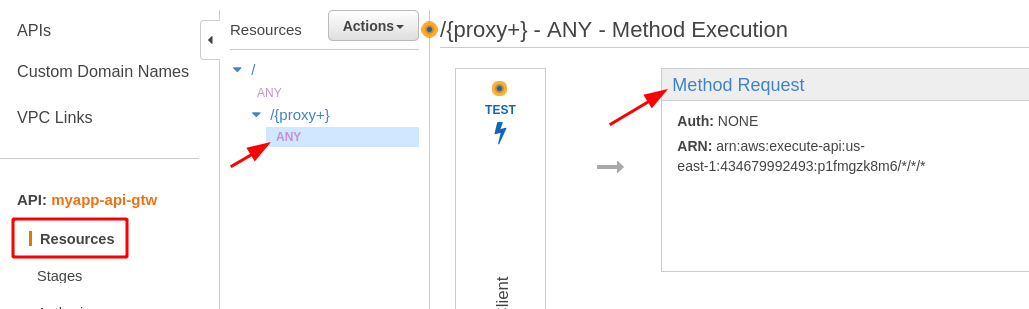
- Select Resources in the left menu, then ANY and Method Request.
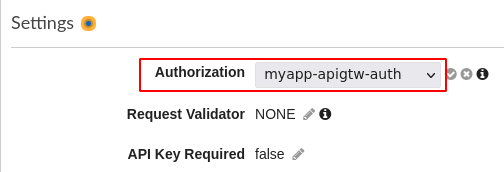
- In the settings, expand the Authorization dropdown and select the Lambda authorizer function
For those changes to be effective, we need to re-deploy the API. Open Actions and select Deploy API to update the API Gateway
Test our application
# Testing without authorizationToken
curl 'https://ab1ah50v54.execute-api.us-east-1.amazonaws.com/prod/api/v1/myapp/'
{"message":"Unauthorized"}
# Testing with wrong auhorizationToken
curl -H 'authorizationToken: foo'  'https://ab1ah50v54.execute-api.us-east-1.amazonaws.com/prod/api/v1/myapp/'
{"Message":"User is not authorized to access this resource"}
# Testing with correct authorizationToken
curl -H 'authorizationToken: mysecrettoken' 'https://ab1ah50v54.execute-api.us-east-1.amazonaws.com/prod/api/v1/myapp/'
"It works!"
It works! We have deployed our API on the cloud and made it secure.